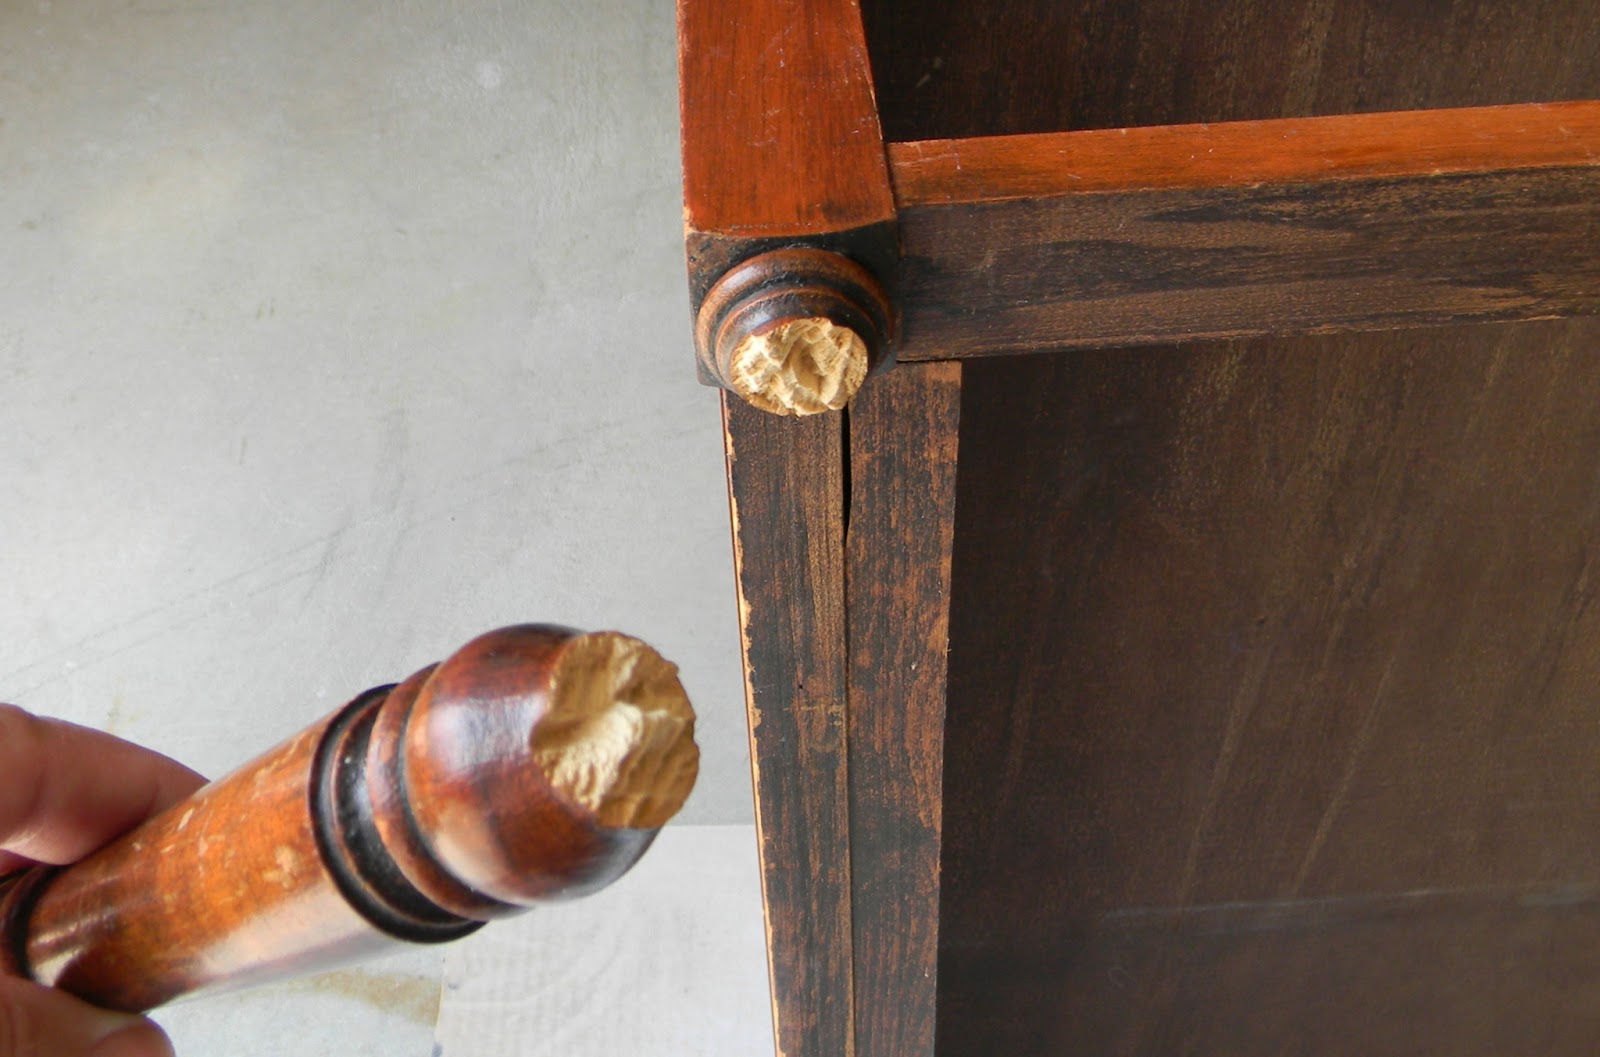
Repair Techniques: Repair Broken Wooden Chair Leg

Repairing a broken chair leg requires careful consideration of the type of break and the materials involved. Several methods can be employed, each with its own advantages and disadvantages. This section explores three common techniques: gluing, screwing, and using dowels.
Preparing the Broken Surfaces
Before applying any repair technique, it is crucial to prepare the broken surfaces properly. This involves cleaning, sanding, and aligning the pieces.
- Cleaning: Remove any dirt, debris, or old glue from the broken surfaces using a damp cloth and mild detergent. This ensures a clean and secure bond.
- Sanding: Roughen the surfaces with sandpaper to create a better surface for the adhesive to grip. Use sandpaper with a grit of 80 to 120 for wood.
- Aligning: Carefully align the broken pieces to ensure a proper fit. Use clamps or weights to hold them in place while the glue dries.
Gluing
Gluing is a simple and effective method for repairing minor breaks. Wood glue, epoxy, or PVA glue are commonly used for this purpose.
- Applying Glue: Apply a thin, even layer of glue to both broken surfaces. Avoid using too much glue, as it can seep out and create a mess.
- Clamping: Securely clamp the broken pieces together, ensuring that they are aligned. Allow the glue to dry completely according to the manufacturer’s instructions.
- Sanding: Once the glue is dry, sand any excess glue and smooth out the repaired area.
Screwing
Screwing is a stronger method than gluing and is suitable for larger breaks or when additional support is required.
- Drilling Pilot Holes: Drill pilot holes slightly smaller than the screw diameter to prevent the wood from splitting.
- Screwing: Insert the screws through one piece of wood and into the other. Ensure the screws are long enough to provide adequate support.
- Countersinking: Countersink the screw heads to create a flush surface.
Using Dowels
Dowels are cylindrical wooden rods that are used to reinforce a repair by creating a strong, interlocking connection.
- Drilling Holes: Drill matching holes in both broken surfaces to accommodate the dowel. The diameter of the hole should be slightly smaller than the dowel.
- Inserting Dowels: Apply glue to the dowel and insert it into the holes.
- Clamping: Clamp the broken pieces together to hold the dowels in place while the glue dries.
Reinforcing and Finishing

A sturdy repair is only half the battle. To ensure your chair stands the test of time, you need to reinforce the repaired leg and blend the repair seamlessly with the rest of the chair. This involves using appropriate materials for reinforcement and finishing techniques that make the repair practically invisible.
Reinforcing the Repair
Reinforcing the repaired leg is crucial to prevent future damage and ensure the chair’s stability. This involves adding extra support to the weakened area, preventing it from breaking again. Several methods can be used, each with its advantages and disadvantages.
- Wood Filler: Wood filler is a common solution for filling gaps and cracks in wood. It’s easy to apply and dries quickly. However, it’s not as strong as other options and may not be suitable for larger repairs.
- Epoxy: Epoxy is a strong adhesive that can be used to bond broken pieces of wood together. It’s also waterproof and durable, making it a good choice for outdoor furniture. However, it can be messy to work with and requires careful application.
- Metal Brackets: Metal brackets offer the strongest reinforcement. They are ideal for larger repairs or areas that experience significant stress. However, they may be more visible and require drilling into the wood.
Sanding and Finishing, Repair broken wooden chair leg
Once the repair is reinforced, it’s essential to sand and finish the area to blend it seamlessly with the rest of the chair. This involves smoothing out any rough edges and creating a uniform surface.
- Sanding: Start with coarse-grit sandpaper to remove any excess wood filler, epoxy, or other materials. Gradually move to finer grits to achieve a smooth finish.
- Finishing: The final step involves applying a finish to protect the wood and enhance its appearance. This could be paint, stain, or varnish, depending on the chair’s style and your preference.
Applying Paint, Stain, or Varnish
Applying a finish to the repaired leg is crucial for both protection and aesthetics. It blends the repair with the rest of the chair and enhances its overall appearance.
- Prepare the Surface: Ensure the repaired area is clean, dry, and free of dust or debris.
- Apply the Finish: Follow the manufacturer’s instructions for applying the chosen finish. Use a brush, roller, or spray gun, depending on the product and the size of the repair.
- Let It Dry: Allow the finish to dry completely before using the chair. This ensures the finish sets properly and protects the repaired area.
Repair broken wooden chair leg – The splintered leg of the chair, a silent testament to years of wear, reminded me of a simpler time. I remember the sleek lines of the Carson Carrington Nybro Walnut Wood Modern Office Chair , a chair that promised both comfort and style, but now seemed as distant as a forgotten dream.
Perhaps this old chair, with its broken leg, held more stories than the newer, more polished models ever could.
The broken leg of the chair, a silent testament to time’s relentless march, feels like a lost limb. I yearn for the days when it held me securely, a haven of comfort. Perhaps a wooden rifton chair with tray would offer a similar solace, its sturdy frame a symbol of enduring strength.
Yet, the memory of this chair, with its weathered wood and familiar creak, lingers. Maybe, with a little care, I can restore it to its former glory, a testament to the enduring power of memory and repair.
